Window Solutions
Window Tint/Film
Windows Blinds
Windows Shades


If surround sound feels impressive in one seat but vague or distracting in another, speaker placement is often the reason. Knowing where to put surround sound speakers helps voices stay anchored to the screen, effects move naturally around the room, and music feel balanced instead of coming from a few obvious boxes.
The good news is that you do not need a perfectly symmetrical theater to get useful results. A living room, media room, bonus room or dedicated theater can all sound convincing when the layout starts with the main listening position and each speaker is given a clear job.
This guide focuses on placement rather than equipment shopping or installation services. It covers the practical differences between 5.1, 7.1 and Dolby Atmos, plus the room details that affect the final layout.
Speaker placement should begin with the place where you care most about the sound. In many rooms that is the center seat of a sofa or the middle of the primary seating row, sometimes called the main listening position.
Use that seat as the reference point for angles and distances. You can still create good coverage for several people, but trying to make every seat equally perfect usually leads to compromises that make the whole system less precise.
Before mounting anything, sit in the main seat and look at the room as a listener would. Note the screen, walls, doorways, ceiling height and any furniture that limits speaker locations.
The front three speakers do most of the work in movies and television. Dialogue usually comes from the center channel, while the left and right speakers carry music, movement and effects that should blend smoothly with what is happening on screen.
Place the left and right speakers to either side of the display, ideally with their tweeters near seated ear height. They should not be pushed so far apart that sound seems detached from the picture, but they also need enough separation to create a convincing stereo image.
The center speaker belongs as close to the vertical center of the screen as practical. If it must sit above or below the display, angle it toward the listeners rather than letting it fire over their heads or into their knees.
A 5.1 system uses three speakers at the front, two surround speakers and one subwoofer channel. The surrounds should create a sense of space beside and slightly behind you, not behave like a second pair of front speakers.
For the main seat, think of the surround speakers as sitting roughly to the sides or a little behind the listening position. In a typical room, placing them at about 90 to 110 degrees from the direction you face gives effects room to move past you without sounding as though they are firing directly into your ears.
If the speakers are close to the seating area, mounting them slightly above seated ear level can make the sound less localized. In a wider room where the speakers are farther away, keeping them closer to ear height can preserve detail and clarity.
A 7.1 layout adds two rear surround speakers behind the listening position. Those extra channels help separate sounds that happen beside you from sounds that move behind you, which can make a larger room feel more continuous and less dependent on a single pair of surrounds.
The side surrounds remain beside or just behind the listener, while the rear pair sits farther back and is spaced apart. If the sofa is against the back wall, there may not be enough depth for rear speakers to create a useful second layer.
In that situation, a well-arranged 5.1 system can be better than forcing 7.1 into a room that cannot support it. More channels do not automatically mean better sound when the speakers have nowhere useful to go.
Dolby Atmos adds height information so effects can move above the listener as well as around the room. The cleanest approach is usually to use in-ceiling or ceiling-mounted speakers positioned in relation to the main seating area, rather than simply placing extra speakers anywhere overhead.
In a common 5.1.2 layout, two height speakers are typically placed above or slightly in front of the main listening position. A 5.1.4 or 7.1.4 layout uses front and rear height pairs so overhead movement can travel from one part of the room to another.
Ceiling fans, beams, recessed lights and vaulted ceilings can complicate these positions. When the ideal point is blocked, small adjustments are often possible, but the goal should still be a balanced pair or set around the seating area rather than a visually convenient but acoustically random arrangement.
The “.1” in 5.1 or 7.1 refers to the low-frequency effects channel, but subwoofer placement is less obvious than placing the other speakers. Deep bass interacts strongly with walls and room dimensions, so a location that looks neat can create too much bass in one seat and almost none in another.
A front corner can provide strong output, but it is not automatically the best location. Moving the subwoofer even a few feet can change how evenly bass is distributed, especially in rectangular rooms or spaces with openings into hallways and kitchens.
If possible, test more than one position before committing to cabinetry or hidden wiring. A system can always be calibrated later, but calibration works best when the physical placement is already reasonably good.
Speaker diagrams usually show perfect rectangles because they are easy to understand, not because real homes look that way. Open floor plans, offset seating, fireplaces, large windows and angled walls can all change the best practical location for a speaker.
Hard surfaces also affect what you hear. Tile, glass and bare walls reflect more sound than rugs, upholstered furniture and curtains, which can make a room feel brighter or cause dialogue and effects to lose definition.
That can matter in Tucson homes with tile, large windows or an open connection to another room. Consider the room itself as part of the system rather than treating speaker coordinates as the only factor.
One of the most common mistakes is choosing locations based only on where wiring is easiest to hide. A surround speaker placed far in front of the sofa or a center channel buried inside a cabinet may be tidy, but the sound will not match what is happening on screen.
Another mistake is mounting every speaker high on the wall. Height channels should sound elevated, while the main layer should stay near ear level so around-you and above-you effects remain distinct.
It is also easy to aim speakers at the room instead of the seats. Whenever a speaker has a directional front face, think about where that face is sending sound and whether the important seats actually fall within that listening area.
The best speaker type depends on the room and its role. Bookshelf or floorstanding speakers are easy to aim, while in-wall speakers can keep the room clean without giving up ear-level placement.
In-ceiling speakers are excellent for Atmos when the ceiling geometry supports them. Using ceiling speakers for every channel can be visually discreet, but it also collapses the vertical separation that makes a movie soundtrack feel connected to the screen.
If you are planning a remodel or new construction, wiring before the walls are finished gives you more flexibility. In an existing Tucson home, a careful retrofit can often route speaker cable with limited disruption, but the room layout should still determine the positions before the cable path does.
Modern receivers and processors can measure distance, level and room response with a microphone. Calibration helps balance unequal speaker distances and reduce some room-related problems.
What it cannot do is turn a badly placed speaker into a well-placed one. If the left surround is beside the sofa and the right surround is twenty feet away in a hallway, software can adjust volume and timing but it cannot recreate the same geometry on both sides.
Think of calibration as the finishing step. Placement creates the foundation, and calibration fine-tunes what is already there.
A simple sketch can prevent expensive mistakes. Mark the screen, main seat, secondary seats, doors, windows, ceiling obstacles and possible speaker locations, then compare the room with the layout you are considering.
If you are still deciding how the room should work, our guide on how to plan a home theater covers seating, display, acoustics, wiring and lighting. Speaker placement is easier when it is part of that plan instead of a final detail.
For more complex rooms, a professionally designed home theater system can account for viewing distance, speaker angles and equipment location before anything is mounted. That is useful with open sides, vaulted ceilings, multiple rows or other layout constraints.
The goal of surround sound is not to make you notice every speaker. When placement is working, dialogue stays connected to the screen, movement passes smoothly around the room, and overhead effects feel like part of the scene rather than sound coming from a ceiling grille.
Start with the main listening position, keep the front soundstage coherent and give side, rear and height channels distinct jobs. Those principles matter more than squeezing the largest possible channel count into the room.
If you are planning a dedicated theater or a more complicated residential audio-video system in Tucson, Technology Specialists can help turn the room layout into a practical speaker plan before the wiring, mounting and finishing work begins.
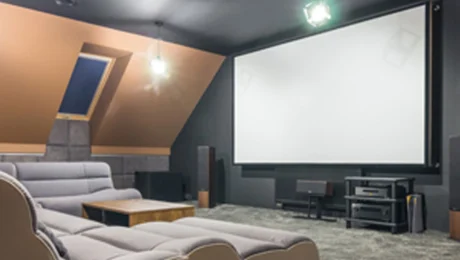
A great home theater starts long before you choose a TV, projector, speakers, or seats. The best results come from planning the room as a complete system, where the screen, sound, seating, lighting, acoustics, wiring, and controls all work together.
If you want to build a dedicated theater room or upgrading an existing multipurpose living space, making the important decisions in the right order can help you avoid costly compromises later.
This guide walks through the main steps to consider when planning a home theater, from the room itself to the final calibration.
Before choosing any equipment, think about how the room will actually be used.
A dedicated home theater gives you much more control over lighting, acoustics, speaker placement, seating, and equipment locations. A family room or multipurpose media space usually requires more compromise because the room already exists, may have some light/sound installations and also needs to work for everyday activities.
Ask yourself a few basic questions:
These decisions affect almost every step that follows.
A home theater designed around the way you actually live will usually be more satisfying than one designed around equipment specifications alone.
The room itself has a major influence on both picture and sound quality; Its dimensions, the material covering its walls, and its shape—all of these factors can influence audio quality and may present limitations or challenges.
Before deciding on screen size or speaker layout, take note of:
Room shape matters as well.
Very small rooms can limit seating and speaker placement, while large open rooms may require more powerful audio systems and additional acoustic control. Rooms with many windows or reflective surfaces can create challenges for both image quality and sound.
If you are building or remodeling, this is also the ideal time to think about wiring, electrical requirements, speaker locations, equipment racks, lighting, and future upgrades.
It is much easier to run the correct cables before the walls are finished than after the room is complete.
One of the most common home theater planning mistakes is choosing the largest possible screen first and figuring out the seating later.
The relationship between screen size and viewing distance is more important than size alone.
A screen that is too small can reduce immersion. A screen that is too large for the seating distance can become uncomfortable, particularly when viewers need to move their eyes or head constantly to follow the image.
Start by deciding where the primary seating position should be.
Then consider:
In rooms with multiple rows, a raised platform may be necessary so the rear seats maintain a clear view.
Seating location also affects the audio system, because speaker placement and calibration are normally built around the main listening area.
Once the seating layout is established, you can make a much better decision about the display.
The two main options are a television or a projector and screen.
Modern televisions can provide excellent brightness, contrast, HDR performance, and image quality with relatively simple installation.
They are often a strong choice for:
Projection can create a much larger image and a more traditional cinema experience.
It is especially attractive in dedicated theater rooms where lighting can be controlled.
A projector setup requires additional planning, including:
The right option depends more on the room and viewing habits than on which technology is inherently “better.”
Sound is one of the biggest differences between simply watching a large screen and experiencing a true home theater.
Modern surround sound systems can range from relatively simple configurations to sophisticated immersive audio systems with speakers around and above the listening area.
You may see layouts described as 5.1, 7.1, 5.1.2, 5.1.4, 7.1.4, etc
The first number generally refers to the main ear-level speakers, the second to subwoofers, and the third—when present—to overhead or height channels used by immersive audio formats such as Dolby Atmos.
More speakers do not automatically mean better sound.
A properly designed and calibrated 5.1 system can outperform a much larger system with poor placement or unsuitable equipment.
The room size, seating arrangement, construction, listening habits, and budget should determine the system layout.
Where speakers are placed can be just as important as which speakers you buy.
The front left, center, and right speakers establish most of the soundstage and dialogue. Surround speakers create immersion around the listening position, while height channels can add another dimension above the audience.
The center channel deserves particular attention because it reproduces much of the dialogue in movies and television.
Avoid choosing speaker locations purely because they are convenient for the room.
Good placement should take into account:
Subwoofer placement can be especially unpredictable.
Low frequencies interact strongly with room dimensions, which means moving a subwoofer only a few feet can substantially change how bass sounds in the seating area.
In some rooms, using two properly positioned subwoofers can produce more even bass throughout multiple seats than relying on one larger subwoofer.
Expensive speakers cannot completely overcome a room with poor acoustics.
Hard surfaces such as tile, glass, drywall, and large uncovered windows reflect sound. Too many reflections can make dialogue harder to understand, reduce clarity, and create harsh or uneven sound.
Furniture, rugs, curtains, upholstered seating, and dedicated acoustic treatments can help control these reflections.
The goal is not to make the room completely “dead.”
A good theater should balance absorption and reflection so that sound remains natural while unwanted echoes are reduced.
Bass behavior is another major consideration. Low frequencies can build up in some parts of a room and disappear in others.
Professional acoustic planning can help address issues such as:
Acoustic treatment is often one of the most effective upgrades in a home theater because it improves the performance of every speaker in the room.
Lighting affects both the atmosphere of the room and the quality of the image.
In a dedicated theater, complete light control may be desirable during movies, but you will still need practical lighting for entering the room, finding seats, or using the space when the system is off.
Useful options may include:
If the theater includes a projector, controlling ambient light becomes even more important.
Even with a television, eliminating reflections from windows and poorly positioned lights can noticeably improve the viewing experience.
Planning lighting early also makes it possible to integrate it with the rest of the theater controls.
A single “Movie” command, for example, might dim the lights, turn on the AV system, select the correct source, and adjust shades automatically.
The cables behind a home theater are not exciting, but they can determine how reliable and upgradeable the system will be.
A well-planned home theater setup may require wiring for:
Whenever possible, run structured wiring while walls and ceilings are accessible.
It is also worth thinking beyond today’s equipment.
Adding conduit or extra network cabling during construction is relatively inexpensive and can make future upgrades much easier.
Networking has become especially important as more home theater components depend on streaming, apps, firmware updates, control platforms, and other connected services.
A high-performance theater deserves a reliable network connection.
Receivers, amplifiers, streaming devices, network equipment, control processors, game consoles, and other components all need a home.
In a simple system, they may sit in cabinetry near the display.
In more advanced installations, the equipment may be placed in a dedicated rack elsewhere in the room—or even in another part of the house.
A centralized equipment rack can create a cleaner theater, but it requires careful planning for:
Never treat ventilation as an afterthought.
AV receivers and amplifiers can generate significant heat, and placing them in poorly ventilated cabinets can reduce reliability and equipment life.
A home theater can contain sophisticated technology without being complicated to operate.
Ideally, anyone in the household should be able to sit down and watch a movie without remembering which input to select on three different devices.
A properly designed control system can simplify multiple actions into a few commands.
For example, selecting “Watch Movie” might:
This becomes increasingly valuable as the number of devices grows.
Technology should disappear into the experience rather than becoming another obstacle between you and the movie.
Home theater technology changes faster than walls, ceilings, and furniture.
The exact television, projector, receiver, or streaming device you install today will eventually be replaced. Good infrastructure can remain useful through several generations of equipment.
Whenever possible, prepare for future changes with:
You do not have to install every possible upgrade on day one.
You simply want to avoid designing the room in a way that makes future improvements unnecessarily difficult.
Many disappointing home theaters are not caused by bad equipment. They result from decisions being made in the wrong order.
Some of the most common mistakes include:
A projector, screen, speaker package, or receiver should support the room—not dictate the entire design after the fact.
More size is not always better. Viewing distance and room proportions matter.
Convenient locations are not necessarily acoustically correct locations.
Upgrading electronics may produce less improvement than addressing room reflections, bass problems, or poor speaker placement.
Running cables after walls are closed is usually more difficult, more expensive, and more disruptive.
Streaming and connected control systems depend on reliable network infrastructure.
A system that sounds incredible but frustrates the family every time they use it is not a successful design.
Some home theater projects are simple enough to handle gradually. Others become much easier when the entire system is designed before equipment is purchased or construction begins.
Professional planning can be especially useful when the project involves:
A professional installer can evaluate the room as a complete system rather than treating the display, audio, acoustics, network, and controls as separate projects.
For homeowners in Tucson and the surrounding area, Technology Specialists designs and installs custom home theater systems with the room, equipment, wiring, acoustics, and day-to-day usability considered together.
The goal is not simply to put more technology in the room. It is to create a space where the technology works together naturally—and where watching a movie feels effortless.

The benefits of window film are noticeable in Tucson, where sunlight can affect indoor comfort, screen visibility, furnishings, and cooling demand. The right film can reduce solar heat and glare, improve privacy, filter ultraviolet radiation, update the appearance of glass, and help hold broken glass together. These advantages apply to homes and commercial properties, although the right product depends on the glass and the problem being addressed.
West- and south-facing glass may receive hours of direct exposure, creating hot areas that feel different from the rest of a home, office, store, or public building. Large windows can also produce glare, expose interiors to ultraviolet radiation, and reduce privacy in rooms facing streets, parking lots, or neighboring properties.
Window film works directly on the glass, addressing these problems without keeping blinds or curtains closed all day. It is most practical when the existing glass is in good condition.
Privacy is one of the most immediate window tinting benefits. In a home, film can make bathrooms, entry doors, street-facing rooms, and windows close to neighboring properties feel less exposed. Frosted, matte, patterned, and reflective options can reduce visibility while allowing daylight to enter.
Commercial properties often need privacy in conference rooms, offices, medical spaces, and glass partitions. Decorative films can obscure a direct view without closing the space.
Reflective products generally provide their strongest privacy effect during daylight. At night, interior lighting can make it easier to see inside, so spaces requiring privacy at all hours may be better served by frosted or opaque film.
Direct sunlight can make one side of a room much warmer than another. A living room may become uncomfortable every afternoon, a home office may heat up before the rest of the house, or employees may avoid desks close to a sunny window. These hot spots often lead people to close blinds, lower the thermostat, or use portable fans.
Solar control film rejects part of the sun’s heat before it builds up indoors. The result is a more balanced space, especially in Tucson properties with large panes, sliding doors, storefronts, or intense afternoon exposure.
Homeowners can review residential window film installation options in Tucson for rooms affected by excessive sunlight. Business owners and facility managers can explore commercial window film solutions for Tucson buildings when heat affects offices, schools, stores, restaurants, or other facilities.
A bright room is pleasant until sunlight reflects off a television, computer monitor, presentation screen, or polished surface. Glare can wash out images, make text harder to read, and force people to adjust blinds throughout the day. At home, it may affect remote work or television viewing. In businesses, it can interfere with desk work, video conferences, and presentation screens.
Window film can soften harsh sunlight and reduce reflections while preserving more daylight than closed blinds. A film that is too dark may change the room more than necessary, while one that is too light may not provide enough glare control. Window orientation and room use should guide the selection.
Sunlight can gradually change the appearance of furniture, fabrics, rugs, hardwood floors, artwork, merchandise, and other interior materials. The damage develops slowly, so it may not become obvious until exposed areas look lighter than sections protected by furniture or shade. Ultraviolet radiation contributes to this process, along with visible light, heat, material quality, and exposure time.
Quality films can filter a substantial amount of UV radiation while still allowing natural light through the glass. Window film cannot reverse existing fading or eliminate every cause of deterioration. Its value is preventive: reducing continued exposure may help interior materials retain their appearance for longer.
Our guide to how window film helps protect furniture, flooring, and décor from UV exposure explains why fading develops gradually and which areas are most likely to benefit.
When less solar heat enters through the glass, the air-conditioning system may not need to work as hard to maintain a comfortable temperature. Actual savings depend on the film, glass area, window orientation, shading, building envelope, thermostat settings, and HVAC efficiency. Window film should not be described as producing the same percentage of savings in every property.
The benefit is often most noticeable in spaces with extensive sun exposure. A homeowner may find that a previously hot room becomes easier to cool. A business with a large glass façade may reduce temperature differences between perimeter work areas and interior spaces. Lowering unnecessary solar gain can support more efficient operation during Tucson’s hottest months.
Window film can change the appearance of glass without replacing it. Neutral solar films can create a more uniform exterior, while frosted and patterned products can turn plain glass into a finished design element. Decorative film can also update an interior partition with less disruption than installing specialty glass.
For homeowners, film can improve entry doors, bathroom windows, and sidelights. For businesses, it can add privacy, modernize partitions, and give storefront or lobby glass a more polished appearance. Many products remain subtle rather than dark or mirrored.
Standard glass can create loose, sharp fragments when it breaks. Safety and security films are thicker products designed to help hold shattered glass together. They do not make a window unbreakable, but they can reduce the scattering of glass after an impact and make it more difficult for the opening to clear immediately.
In homes, this added layer may be useful near doors, large panes, or locations where accidental impact is a concern. In commercial settings, safety and security window films may be considered for storefronts, schools, offices, and other buildings where broken glass could cause injuries or expose property.
Performance depends on the film, glass, framing, attachment method, and impact. A solar-control tint should not automatically be treated as a security product; the film must be specified for its intended purpose.
The core benefits are similar, but the priorities often differ. A homeowner may focus on a hot family room, fading hardwood, privacy near the street, or glare on a television. A commercial project may involve larger glass areas, employee comfort, customer visibility, interior partitions, merchandise protection, or installation around normal operations.
Commercial projects may also require a consistent appearance across an entire façade, with different films assigned to different functions.
Window film does not repair failed seals, damaged frames, water intrusion, or glass that already needs replacement. It also does not provide the same insulation value as replacing an outdated window assembly with a modern unit designed for higher thermal performance.
Compatibility matters as well. Certain films may not be appropriate for every type of glass, particularly when dual-pane construction, existing coatings, damage, or manufacturer warranties are involved. The glass and film specifications should be reviewed before installation rather than choosing a product based only on shade or appearance.
Start by defining the problem. A room needing daytime glare control may require a different film than a bathroom needing permanent privacy. A storefront concerned about shattered glass needs a different specification than an office trying to reduce heat while preserving a nearly clear exterior.
Window orientation, glass type, existing shading, desired light level, and interior finishes should all be considered. In many cases, the best solution is not the darkest film. A neutral or nearly clear product may provide the desired performance without changing the building’s character. Professional installation also helps produce clean edges, consistent alignment, and a smooth finish.
For many Tucson homes and businesses, window film is worth considering when sunlight is creating a recurring problem. It can make hot or glare-heavy rooms easier to use, reduce UV exposure, provide practical privacy, improve the appearance of glass, and add a measure of protection when glass breaks.
The best results come from selecting the film around the property rather than assuming one product fits every window. Technology Specialists can assess the glass and exposure, then recommend a film that balances heat control, daylight, privacy, appearance, and safety.
Natural sunlight can make a home feel brighter, warmer, and more inviting. However, prolonged sunlight through untreated windows can also expose furniture, flooring, artwork, and other interior surfaces to ultraviolet radiation.
The resulting damage usually happens slowly. Fabrics lose their color, wood finishes begin to look uneven, flooring develops faded areas, and valuable décor may deteriorate sooner than expected.
Home window tinting for UV protection provides a practical way to reduce this exposure without covering your windows or sacrificing the natural light that makes your home comfortable.
Standard residential glass filters much of the sun’s UVB radiation, but it does not necessarily block the same amount of UVA radiation. This means that people and furnishings positioned near sunny windows may still experience prolonged UV exposure.
The effects are rarely noticeable from one day to the next. Instead, the exposure accumulates over months and years. A sofa may become lighter on the side closest to the window, hardwood flooring may develop uneven coloring, or artwork may gradually lose its original vibrancy.
Curtains, blinds, and shades can reduce direct sunlight when they are closed, but many homeowners want to keep their windows uncovered during the day. Window film works directly at the glass, providing continuous UV reduction while allowing rooms to remain open and naturally illuminated.
Residential window film is applied directly to the glass and is designed to filter specific portions of the sun’s energy before they enter the room.
High-quality UV protection window film can block a substantial percentage of ultraviolet radiation while continuing to transmit visible light. This allows homeowners to address UV exposure without making every room feel noticeably darker.
Technology Specialists installs professional 3M™ residential window films that can block up to 99% of the sun’s UV rays, depending on the selected product. These films are designed to help protect interiors while preserving the clarity and natural light homeowners want from their windows.
It is important to remember that window film cannot reverse existing fading. Its principal value is preventive. Installing film before extensive damage occurs can help slow further deterioration and preserve the appearance of interior materials for longer.
Upholstered furniture is particularly vulnerable when it sits close to a window receiving direct sunlight. Sofas, chairs, cushions, curtains, and other fabrics may gradually lose color or develop uneven fading.
Darker and more vibrant fabrics can make this contrast especially noticeable. One portion of a sofa may remain protected by shade while another portion receives direct sunlight every afternoon.
Window film to prevent fading helps reduce one of the major factors contributing to this damage. It provides protection throughout the day without requiring homeowners to keep curtains or blinds permanently closed.
This can be particularly valuable in living rooms, family rooms, dining areas, and other spaces where large windows and carefully selected furnishings are prominent parts of the design.
Flooring can also experience prolonged exposure to sunlight. Hardwood, laminate, luxury vinyl, rugs, and other surfaces may develop faded or discolored areas in the portions of a room receiving the most direct sun.
The pattern often becomes obvious when furniture or rugs are moved. Covered areas retain more of their original appearance, while exposed sections look noticeably lighter.
Home window tinting helps reduce the UV radiation reaching these surfaces. Although no solution can completely eliminate every cause of fading, professionally installed film can help slow the process and maintain a more consistent appearance across the room.
For homeowners who have invested in quality flooring, cabinetry, or custom wood finishes, preventive UV protection can be considerably easier than repairing or replacing sun-damaged materials later.
Artwork, framed photographs, wallpaper, decorative textiles, and personal collections may also be affected by sunlight.
These objects are sometimes difficult or impossible to restore once their colors have faded. Moving them away from windows may help, but that is not always practical, especially in rooms with large glass surfaces or limited wall space.
UV-blocking window film creates an additional protective barrier at the window. This allows homeowners to continue displaying meaningful or valuable items while reducing their exposure to damaging radiation.
Window film is not a replacement for museum-grade preservation in every situation, but it is a practical protective measure for everyday residential interiors.
A common concern is that window tinting will make a home feel dark or noticeably change the appearance of the windows.
Modern residential films are available in a range of visible light transmission levels. Some are nearly clear and are specifically designed to provide solar and UV performance without creating a heavily tinted appearance.
The darkest film is not necessarily the best option for UV protection. Film selection should be based on verified performance specifications, window orientation, heat exposure, glare, room use, and the amount of natural light the homeowner wants to retain.
A professional assessment can help determine which product provides the appropriate balance between protection, clarity, heat rejection, and comfort.
UV reduction may be the primary topic, but residential window film can also address several related comfort problems.
Bright sunlight can create glare on televisions, computer screens, polished surfaces, and glass tables. It can make a home office difficult to use during certain hours or force homeowners to close their blinds while watching television.
Solar heat entering through windows can also contribute to hot spots, particularly in rooms exposed to strong afternoon sun. Depending on the film selected, window tinting can reduce glare and reject part of this solar heat while retaining the room’s natural brightness.
The result is a more balanced space that can be easier to work in, relax in, and enjoy throughout the day.
UV protection is only one part of the picture. Review the full benefits of window film for Tucson homes and businesses to learn how the right film can also improve privacy, reduce heat and glare, support energy efficiency, and add a measure of glass safety.
Window film does not necessarily need to be installed on every window. The most appropriate locations are usually the areas receiving sustained direct sunlight or containing materials that homeowners particularly want to protect.
These may include:
Evaluating each room individually makes it possible to prioritize the windows where UV protection and solar control will provide the greatest benefit.
Not every residential window film offers the same performance. Products can differ in UV rejection, heat rejection, visible light transmission, reflectivity, appearance, and compatibility with different types of glass.
Professional installation also matters. The glass must be evaluated, measured, cleaned, and prepared correctly before the film is applied. Proper product selection and installation help produce a smooth appearance and reliable long-term performance.
Technology Specialists can evaluate your windows, identify the rooms receiving the most intense sunlight, and recommend a 3M™ window film based on your protection and comfort goals.
Learn more about our professional home window tinting in Tucson and the residential film options available for your home.
UV-related fading is gradual, permanent, and often difficult to notice until a visible difference has already developed.
Home window tinting for UV protection allows homeowners to take preventive action before upholstery, flooring, wood finishes, artwork, and décor show extensive sun damage. It can also reduce glare and improve the comfort of rooms that receive strong direct sunlight.
Most importantly, modern residential window film makes it possible to reduce unwanted exposure without completely blocking the daylight and views that make a home enjoyable.
Technology Specialists provides professional 3M™ residential window film installation for homeowners throughout Tucson and Southern Arizona.
Contact our team to schedule a free in-home estimate and find the right balance of UV protection, natural light, heat control, and everyday comfort.
Call Technology Specialists at (520) 784-2500 or request your free estimate today.

Licensed & Bonded
ROC# 285238
ROC# 306779
HOURS
Monday - Friday
8 am - 5 pm